Posts

Showing posts with the label django

My first month as Searchlight's PTL

Image
At the end of the Rocky development cycle of OpenStack, the Technical Committee intended to remove Searchlight [1] and some other projects (e.g. Freezer) from the Governance (OpenStack official projects). The reasons for that are because Searchlight has missed several milestones and lacked communication of the PTLs (Project Technical Lead). I couldn't stand the fact that a pretty cool project would be abandoned so I nominated to be the PTL of Searchlight for the Stein cycle. I hope that I can do something to revive it. Why should Searchlight be revived?  That is the question I tried to answer when decided to take the lead. It's harder and harder for cloud operators to get the information about the resources of other services (e.g Nova Compute, Swift, Cinder etc.) because they evolve very fast and there are more and more resources and APIs are made (Do you hear about the placement API of Nova?). Searchlight is pretty cool in this case because It centralizes all of that inf

Django DB migration when you're using a custom MySQL installation dir

For some reason, you installed MySQL in a different path than the default /etc/mysql/. Then if you run the Django's migrate command, it will fail because It cannot communicate with the MySQL process: django.db.utils.OperationalError: (2002, "Can't connect to local MySQL server through socket '/var/run/mysqld/mysqld.sock' (2)") If that's the case, you can use the following option in your Django's configuration to indicate the socket directory of MySQL: DATABASES = {     'default': {         'ENGINE': 'django.db.backends.mysql',         'OPTIONS': {             'read_default_file': '/path/to/my.cnf',         },     } } That's it. Profit!!!

How to dev a new Horizon dashboard without devstack/fullstack OpenStack

Everybody knows the easiest way to build a new Horizon dashboard is to use devstack. But, devstack requires a number of resources (16GB of RAM for a workable devstack in my experience). So what can you do if you only have a laptop with 4-8GB RAM? Easy, easy, follow these setups: 1. Install keystone (the minimum requirement of Horizon): Follow this official instruction:  https://docs.openstack.org/keystone/latest/install/keystone-install-ubuntu.html Read these blog posts to fix some issues: http://www.dangtrinh.com/2018/03/fix-error-attributeerror-module-object.html http://www.dangtrinh.com/2018/03/fix-importerror-cannot-import-name.html http://www.dangtrinh.com/2018/03/how-to-fix-index-column-size-too-large.html 2. Install Horizon: Follow this official instruction to install Horizon on your computer:  https://docs.openstack.org/horizon/latest/contributor/quickstart.html#quickstart 3. Building your own dashboard: Using this document:  https://docs.openstack.org/horizon

"Database returned an invalid value in QuerySet.datetimes()" error when add a new language in Open edX

I was trying to add another language to my Open edX site in the Django's admin dashboard and this is what I got: Internal Server Error: /admin/dark_lang/darklangconfig/ ...   File "/edx/app/edxapp/venvs/edxapp/local/lib/python2.7/site-packages/django/db/models/expressions.py", line 927, in convert_value     "Database returned an invalid value in QuerySet.datetimes(). " ValueError: Database returned an invalid value in QuerySet.datetimes(). Are time zone definitions for your database and pytz installed? Oh crap... what's that? Turns out it's an error of MySQL and Django. So, do the following to fix: 1. Populate the timezone definitions in the 'mysql' table mysql_tzinfo_to_sql /usr/share/zoneinfo | mysql -u root -p mysql 2. Flush tables mysql -u root -p -e "flush tables;" mysql  Reference:   https://stackoverflow.com/questions/21351251/database-returned-an-invalid-value-in-queryset-dates

edx-platform - How to make SMTP work on your Open EdX instance the proper way

There were several threads in the Open EdX mailing list asking about how to make the email working. But, it seams like there is no proper instructions out there to help people. So, I decided to write something about that. Firstly, there are 3 simple things to keep in mind: All the authentication information should be kept privately. If you add them to the edx-platform source files there will be conflicts when you upgrade or pull from master/branches. So, the best place to keep all the settings for all your Open edX applications is /edx/app/edx_ansible/server-vars.yml .  0. Checkout all of your modification on: (to avoid source code conflicts) cms/envs/common.py lms/envs/aws.py cms.env.json cms.auth.json lms.env.json lms.auth.json 1. Create  server-vars.yml   in  / edx/app/edx_ansible/ 2. Add these following variables to server-vars.yml with your SMTP information: EDXAPP_EMAIL_BACKEND: 'django.core.mail.backends. smtp.EmailBackend' EDXAPP_EMAIL_HOST: 'localho

Generate excel file with openpyxl in Django

I find this python module quite interesting and useful for my Django project: openpyxl :  https://openpyxl.readthedocs.org/en/default/ Here is a sample snippet: It allows the user to generate the excel file and download it.

Duplicate entry error with the Django's User Profile model

I wrote a User Profile model which extends the Django's User authentication model as following: class TeacherProfile (models.Model):     user = models.OneToOneField(User, related_name="teacher_profile", \                         related_query_name="profile")     teacher_number = models.CharField(max_length=255, blank=True, null=True) # Office     desc = models.CharField(max_length=255, blank=True, null=True) # Description     title = models.CharField(max_length=255, blank=True, null=True)     school = models.ForeignKey('School', null=True,                          related_name="steacher_profiles",                         related_query_name="steacher_profile",             )     def __unicode__(self):       return '<TeacherProfile %s>' % self.teacher_number # auto create teacher profile the first time student log-in def create_teacher_profile (sender, instance, created, **kwargs):     if created:        

Set the default session expired time in Django

In Django, you can set the expired time of session by this setting, for example after 10 minutes: SESSION_COOKIE_AGE = 10 * 60 In addition, if you want the session will be expired when the user closes her browser, you can set: SESSION_EXPIRE_AT_BROWSER_CLOSE = True

Saving image to Django's ImageField programmatically

In order to save an image to a Django model's ImageField programmatically instead of using the upload form, you can do as following example: 0. Assuming you have this model: models.py ... class MyModel (models.Model):     image = models.ImageField(upload_to='path') ... 1. First, upload your image to the upload_to folder defined in your  settings.py : ... UPLOAD_TO = 'photos' ... 2. In  views.py or any utility module: from django.conf import settings ... layout = MyModel() layout.image = "%s/image.png" % settings.UPLOAD_TO layout.save() Reference:   http://stackoverflow.com/questions/1308386/programmatically-saving-image-to-django-imagefield

Remove all celery tasks in Django

To delete all the celery tasks in Django, run the following command: (venv): ./manage.py celery purge

ImageField overwrite image file with same name

The default behavior of the Django ImageField when you upload a new image has the same name with an existing image Django will add suffix to that new one: existingname_<somesuffix>.JPG But if the image names are identical and represent each object in the database (named after the object's pk), you don't want to have that suffix added. You just want to remove the existing one with the new photo. If that the case, you can define your storage class and assign to the ImageField in models.py like the following example: 1. Create a file name storage.py and put it in the same place with settings.py: from django.core.files.storage import FileSystemStorage from django.conf import settings import os class OverwriteStorage( FileSystemStorage):     def get_available_name(self, name):         """Returns a filename that's free on the target storage system, and         available for new content to be written to.         Found at http://djangosnippet

Django ImageField rename file on upload

By default Django keeps the original name of the uploaded file but more than likely you will want to rename it to something else (like the object's id). Luckily, with ImageField or FileField of Django forms, you can assign a callable function to the upload_to parameter to do the renaming. For example: from django.db import models from django.utils import timezone import os from uuid import uuid4 def path_and_rename (instance, filename):     upload_to = 'photos'     ext = filename.split('.')[-1]     # get filename     if instance.pk:         filename = '{}.{}'.format(instance.pk, ext)     else:         # set filename as random string         filename = '{}.{}'.format(uuid4().hex, ext)     # return the whole path to the file     return os.path.join(upload_to, filename) class CardInfo (models.Model):     id_number = models.CharField(max_length=6, primary_key=True)     name = models.CharField(max_length=255)     photo = models.Ima

Django - object has no attribute 'user' error

I got this error this morning when trying to test my Django app: Internal Server Error: /staff/acts/email/ Traceback (most recent call last):   File "/path/to/virtualenv/myenv/local/lib/python2.7/site-packages/django/core/handlers/base.py", line 111, in get_response     response = wrapped_callback(request, *callback_args, **callback_kwargs)   File "/path/to/virtualenv/myenv/local/lib/python2.7/site-packages/django/contrib/auth/decorators.py", line 22, in _wrapped_view     return view_func(request, *args, **kwargs)   File "/path/to/app/views.py", line 519, in email_main     confirm_sent = send_email(confirm_email_form, 'confirm', request)   File "/path/to/virtualenv/myenv/local/lib/python2.7/site-packages/django/contrib/auth/decorators.py", line 21, in _wrapped_view     if test_func(request.user): AttributeError: 'EmailTemplateForm' object has no attribute 'user' I figured out the reason causing this issue is

Auto create and populate UserProfile in Django 1.7 with django-auth-ldap

To map some extra information of the Active Directory user into my Django's StudentProfile (UserProfile) model (Django 1.7 and django-auth-ldap 1.2.5), I have to call a post_save signal: In my models.py: from django.db import models from django.contrib.auth.models import User from django.db.models.signals import post_save from django_auth_ldap.backend import LDAPBackend class StudentProfile (models.Model): user = models.OneToOneField(User, related_name="student_profile", related_query_name="profile") student_number = models.CharField(max_length=255) # Office class_of = models.CharField(max_length=255) # Description def create_student_profile (sender, instance, created, **kwargs): if created: new_profile = StudentProfile.objects.create(user=instance) user = LDAPBackend().populate_user(instance.username) if user: desc = user.ldap_user.attrs.get("description", [])[0] office = user.ldap_user.attrs.get("physicalDel

Google Apps Script - Part 3 - Send email with form after submitting google form (advanced)

Image
So, you now know how to send people email after submitting a google form ? How about including in that email a form required that person to answer some questions? And the data that she submit will be inserted back into the response spreadsheet of the original form. Yeah, another form, sounds like inception huh :D Here is a hack: 1. In the email template, include the form: <h2>Please respond to the reflection question(s) posed to you in the Teacher Feedback form</h2> <form action="http://localhost:8081/myform" method="POST"> <input type="hidden" name="rownumber" value="{{rownumber}}"> <div> <textarea name="q" style="width:90%;height:100px;"></textarea> </div> <div> <button type="submit">Submit</button> </div> </form> The form will look something like this in the email: N

How to avoid "Models aren't loaded yet." error in Django 1.7

Today, I's trying to run a python script to manipulate my Django app's models and got this error: django.core.exceptions.AppRegistryNotReady: Models aren't loaded yet. The script used to work before I upgraded my Django project to version 1.7. I then go back to the Django1.7 documentations I found this instruction: https://docs.djangoproject.com/en/dev/releases/1.7/#standalone-scripts Standalone scripts If you’re using Django in a plain Python script — rather than a management command — and you rely on the DJANGO_SETTINGS_MODULE  environment variable, you must now explicitly initialize Django at the beginning of your script with: >>> import django >>> django . setup () Otherwise, you will hit an  AppRegistryNotReady  exception. So, I modified my script as following: #! /usr/bin/env python def setup_environment(): pathname = os.path.dirname(sys.argv[0]) sys.path.append(os.path.abspath(pathname)) sys.path.append(os.path.normpa

Active Directory authentication in Django

In this article I showed you how to authenticate users of your Django apps against a LDAP server. It's quite easy with open-sourced software huh?! But, if your current infrastructure is built on a proprietary software like MS Active Directory, you will need an extra effort to plug in your Django projects. I will show you how. Read on! Here are the important settings for django-auth-ldap module you need to set: * USER SEARCH : AUTH_LDAP_USER_SEARCH = LDAPSearch("OU=All Users,DC=MYAD,DC=COM", ldap.SCOPE_SUBTREE, ' (SAMAccountName=%(user)s)' ) * GROUP SEARCH : # Set up the basic group parameters. AUTH_LDAP_GROUP_SEARCH = LDAPSearch("OU=User Groups,OU=All Users,DC=MYAD,DC=COM", \                     ldap.SCOPE_SUBTREE, "(objectClass=organizationalUnit)") , #!important! set group type AUTH_LDAP_GROUP_TYPE = NestedActiveDirectoryGroupType() * USER FLAGS : AUTH_LDAP_USER_FLAGS_BY_GROUP = {     "is_active": ["CN=Ad

How to show the correct object numbers (counter) when using django-pagination

I'm using this template tag to output the order numbers of an object list in a for loop: {% for myobj in myobjlist %} {{ forloop.counter }} ... {% endfor %} But if I use pagination, the number will always start from 1 in a new page. Here is the trick to show the correct number: add to the counter (use zero index instead, counter0) the object index: {{ forloop.counter0|add:myobjlist.start_index }} Neat!

Trying the Taiga project management platform

Image
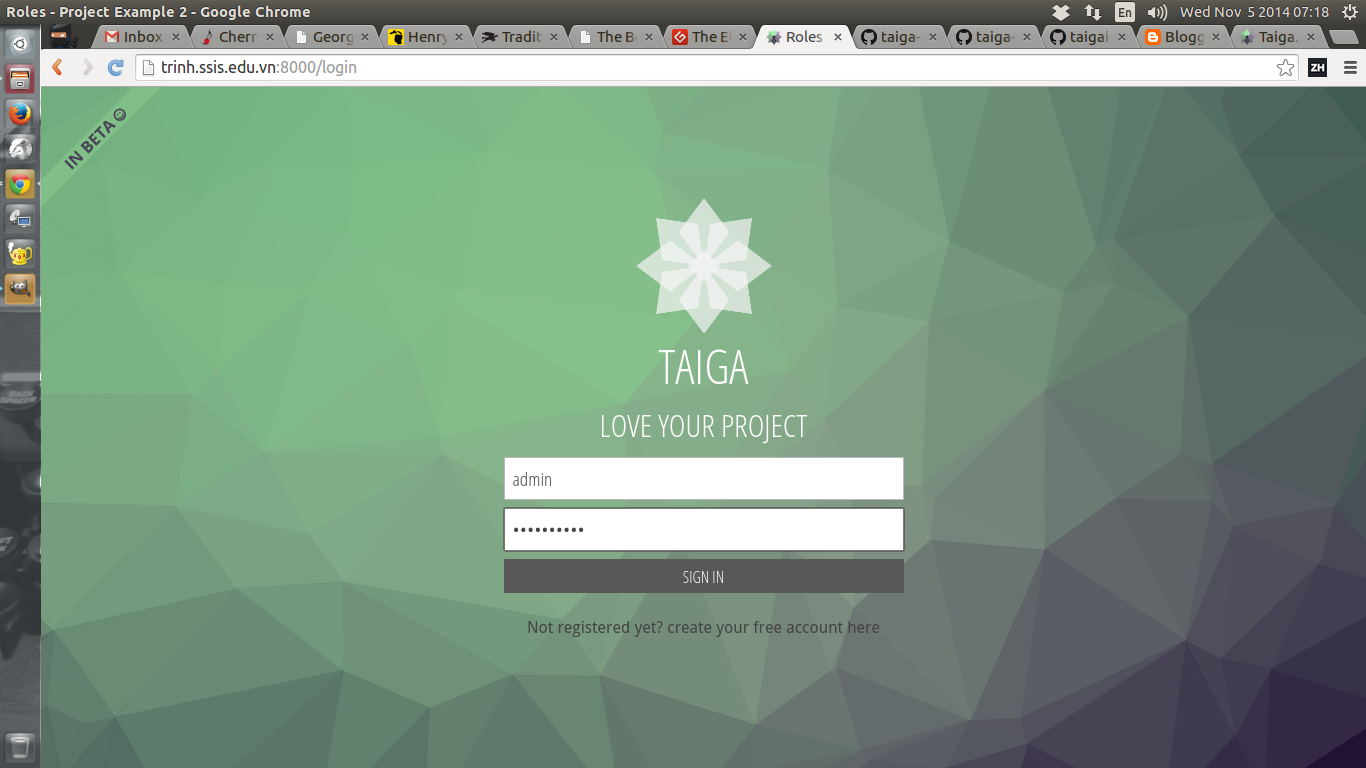
If you love Agile and looking for a tool to integrate that method into your org, you should try Taiga: https://taiga.io/ Taiga is an open-sourced project management platform based on Django and AngularJS which are both also open-sourced. It's really easy to get started with Taiga using vagrant thanks to the team: https://github.com/taigaio/taiga-vagrant All you have to do are (you need to have VirtualBox and Vagrant installed on your machine first): $ git clone https://github.com/taigaio/taiga-vagrant.git $ cd taiga-vagrant $ vagrant up After the provisioning is finished, you can access the platform by opening your browser, enter this address: http://localhost:8000 The default admin user is admin / 123123 If the vagrant provisioning does not process successfully, you can have a look at the script: https://github.com/taigaio/taiga-vagrant/blob/master/scripts/provision.sh The provision script will clone this taigao-scripts repo and run the setup-server.sh:

Parent Single Log-In with PowerSchool - Part I

Image
Part I - Overview, Create or Update PowerSchool Parent accounts using PHP cURL Earlier this year I had a chance to work on a project which is creating a Single Log-In system for Parents using the PowerSchool data. Unlike other kind of users in PowerSchool (Students, Teacher) Parents cannot be bind to an Active Directory server (Yes, my life would be easier if they support LDAP for Parent accounts!), they are stored in a separate place in the database. After searching around for a while, I recognized that the only way for me to build a Single Log-In system for Parents is using the PowerSchool API and implement the SAML 2.0 protocol. The purpose of PowerSchool supporting this protocol is for developers to create a Single Sign-On layer for customized apps to use PowerSchool as an Identity Provider . To learn the PowerSchool API and to implement the SAML protocol which I never heard before is not a big deal to me as a developer, but in the limited amount of time, I was not sure i